A few weeks ago now, I was told to take some time off work and try and relax. Easier said than done for someone like me, who classes “time off” as “only checking my work emails hourly”. But this time, I listened to the people telling me what to do, and decided to think of a project to keep my mind occupied during my down time.
I had an old Raspberry Pi kicking around at home (no, nothing edible, trust me, edible things don’t have time to get old in our house). Basically, a Raspberry Pi is a very small computer capable of doing very cool things if you tell it to. So, I spent some time on Pinterest looking at things to make with said Pi, and came across the “Magic Mirror”.
Not quite as amazing as it sounds (it’s less magic and more, well, mirror), but it looked like a fairly achievable project that I could tackle, and would kind of push me a bit in terms of using new skills. I’ve not attempted to make anything out of wood for a long time, and probably for a very good reason.
Ashleigh has a mirror. This was always on my mind. Who doesn’t have a mirror!?!? So instantly I started to put myself off making the magic mirror for her, thinking she’d never use it (or it would turn out crap, trust me, that was a BIG fear!) I carried on none the less…..!
So, first things first. Here’s what you’ll need to make a magic mirror:
- Some wood. Various bits. I got away with using one 6ft length of pine, about 3inches wide, half an inch thick. I also bought some decorative moulding to finish off the edges
- A Raspberry Pi. Sure you’ve got one kicking around too, but if you haven’t, they are about £30. You might want to get a wireless card too, for about £5 on ebay.
- A monitor. This is a crucial part. Again, I had one spare at home, but any LCD screen will do. It’s important you get this first, to know the size of the frame you need to build.
- Patience. A lot of patience.
- Lights. For around the edge. I went with kitchen cabinet lighting from B&Q – but any form of strip LED will do the job
- Reflective, Two-Way Perspex
Right, so:
In this Post.....
Step 1 – Plan
Goes without saying, being a Project Manager / Developer, that I had a plan. Ok, so it was scribbled on the back of a piece of paper, but I knew what I was aiming for.
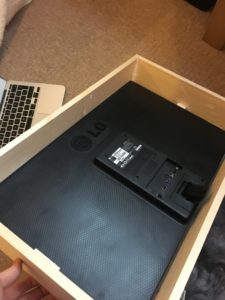
Firstly, you need to know how big your monitor is. I went for a 21.5″ LG LCD screen as I had it at home and wasn’t really using it. Things to consider:
- The depth of the screen
- The depth of the screen with cables coming out of the back
- Whether or not you want to remove the bezel. I didn’t – I’ll explain why later!
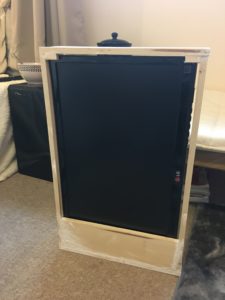
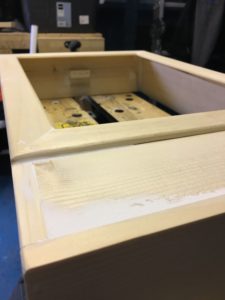
Step 2 – Build a box
At this stage, my primary aim was to just build a box that was slightly bigger than the monitor, both in width/height and depth. I found the 3″ pine was just right

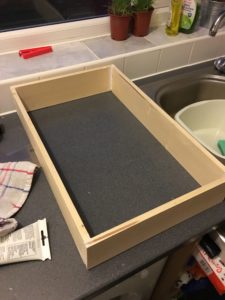
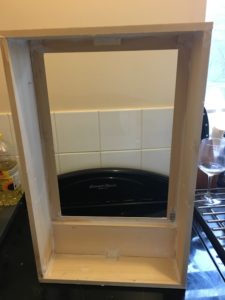
Next up, you need somewhere to hide the internals. With this in mind, I used the last piece of pine to create a cover at the bottom. It worked perfectly as the mirror I purchased was smaller than the screen itself, so this allowed for me to hide the inactive screen, and also to hide the power supply and other cables in here.
Again, don’t be afraid to use filler! You’re better doing it now, and letting it set properly, than rushing it when painting. You can see in the above picture, more little blocks. These are just used to hold the screen in its correct position – I didn’t want anything too permanent in case it ever needs replacing – with this method, you can just pop the screen out if needed.
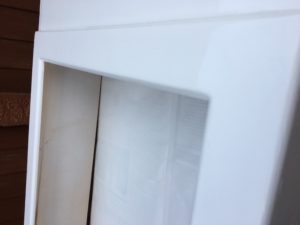
Step 3 – Make the box look a bit nicer
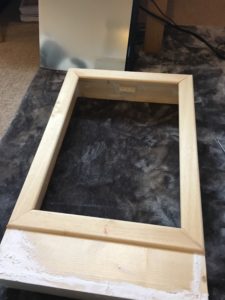
We all like things to look nice, right? I bought some decorative moulding, and a mitre block to get the angles right. I went for a fairly minimalist look for the moulding here. Again, FILLER. Anywhere there is a joint or a screw hole, fill it.
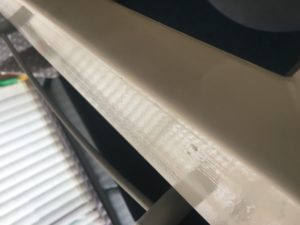
Step 4 – Sanding and painting
I can’t stress how important this bit is / was. And how you need the right stuff to do the job. Firstly, go around the whole thing, and fill in every imperfection. Let it dry, then sand it down. Repeat.
Once you’re happy with the smoothness, hoover it. Dust it down, leave it outside in the wind, whatever. Just get rid of the dust. Then, apply a primer to the wood

Once primed, sand it down, and prime it again. You want it as smooth as possible before you apply the final coat.
I went for an acrylic spray, in white (of course). It’s quick drying, but, it doesn’t fully set until something like 24 hours, might have been even longer. So, with that in mind, don’t do what I did and pick it up once it feels dry. It isn’t / wasn’t, and any prolonged fingers on it will leave prints. Trust me 🙁
With wood, it’s fairly difficult to get it perfect. Over time, it’ll expand or shrink and cracks will show, so just accept that it’s never going to be perfect. But close enough will do for me.
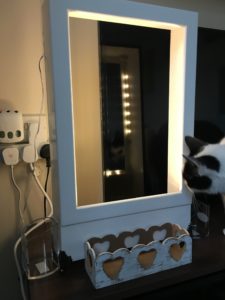
Step 5 – Decorations
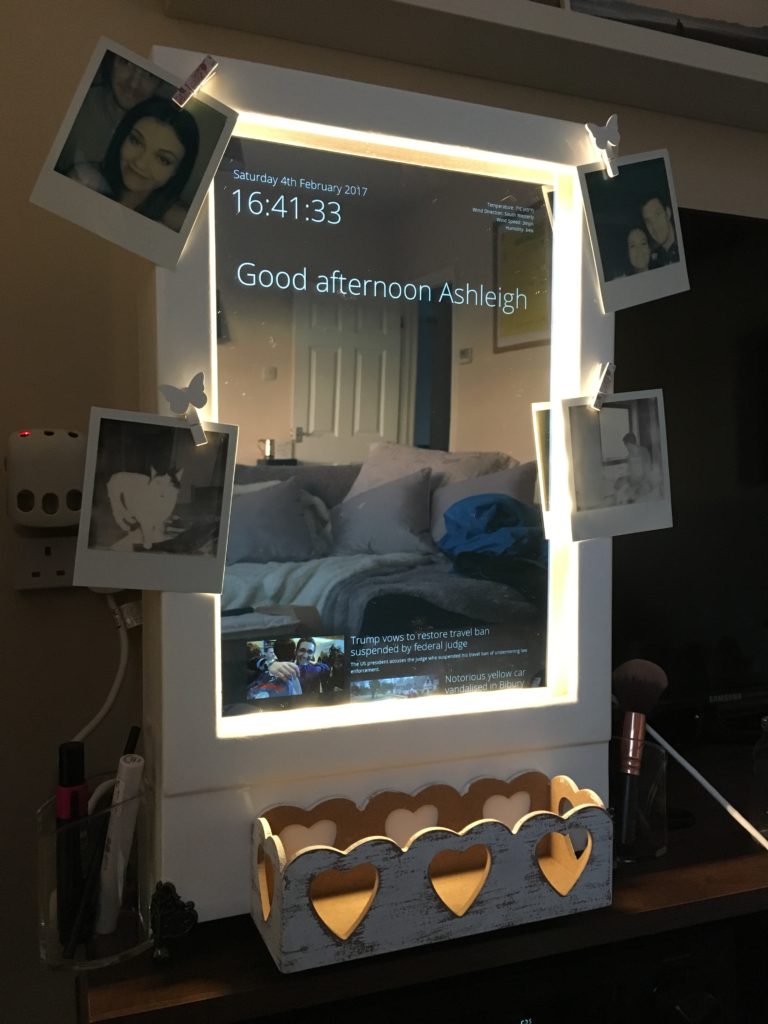
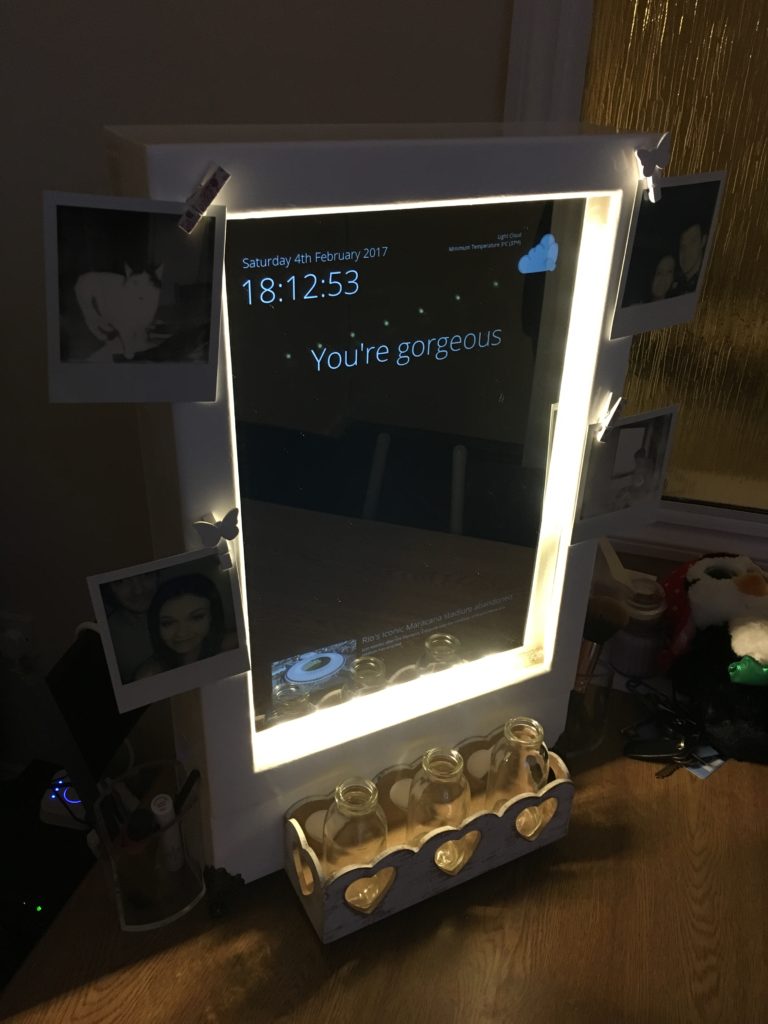
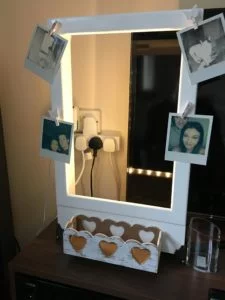
I wasn’t happy with it just being a white box – so I fitted some lights, and some useful containers to hold various makeup related things. I also put a couple of clips for pictures, and some feet on it, just to finish off the front. The lights are mains powered, and are offset around the inside of the case, so they give a glow on to the mirror evenly. The mirror itself is just perspex, two way reflective, so you can see through it when there is light behind it, but its still a mirror. Incredible, that. This was stuck to the bezel of the monitor itself using double sided tape (it’s not heavy).
Step 6 – The Techy Bit
So with the case done, it was time to get the “magic” bit working. I know that Ashleigh is normally wanting to leave by a certain time when getting ready, so I thought it’d be cool to have a clock on the screen. And then I thought, the weather might be nice. And why not put a random message that changes every now and again, just to put a smile on her face.
The Raspberry Pi is basically online, and it calls a web site I made just for the Magic Mirror. I’ve changed the configuration of the Raspberry Pi, so you don’t see any loading screens or anything when it turns on – its purely a mirror, until its loaded, when the information just appears in the mirror as you’re looking at it.
I also added a BBC news feed to the bottom of the screen, just in case Ashleigh fancied keeping up with current affairs 😉 I’ll happily share the script / Raspberry Pi Image with anyone, if you fancied building this yourself.
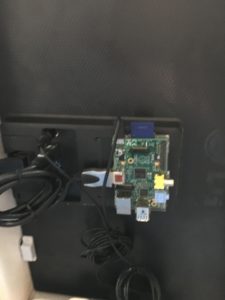
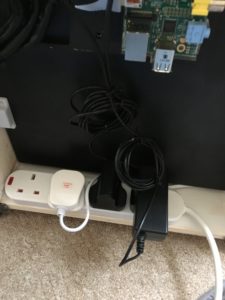
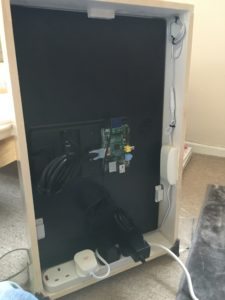
In the pictures above, you can see the Raspberry Pi, the monitor mounted (with two magnets, one either side, to hold it firmly but not permanently), and the transformer for the lighting. There’s also a spare plug socket, for hair dryers, or straighteners, or whatevers. All of this is covered with a small sheet of Ply, which just leaves the plug sockets on display.
And there you have it, an acrylic gloss white Magic Mirror.